Leadpages Review 2024: Features, Pros & Cons, Pricing, And More
With countless landing page builders to choose from, there’s no excuse for you to not create beautiful landing pages on your site or blog.
However, the problem now is choosing the right one for you.
In this post, I’ll be talking to you about arguably the best and most popular landing page builder available – Leadpages.
I’ll show you its different features that set it apart from the rest, how you can use it to build not only attractive but also high-converting conversion tools, and its pros and cons.
Ultimately, this review post will supply all the information you need to decide if Leadpages suits your needs or not.
What is Leadpages?
Leadpages, in a nutshell, allows you to create landing pages & conversion-focused websites using its intuitive and easy-to-use drag and drop builder.
This way, you don’t need to learn code or have any design experience – Leadpages makes it easy even for non-designers to produce compelling pages that generate results.
Whether your goal is to generate more leads and signups or sell more products or services, Leadpages can help you get the job done.
The tool is loaded with extra features:
- Creation of conversion tools – Aside from landing page creation, Leadpages lets you build websites, pop-ups, alert-bars, and trigger links. Using these tools the right way should help turn your target audience into leads and customers. More importantly, they help turn Leadpages into more than just a creator of lead pages for your business.
- Selection of high-converting landing page & website templates – Remove the guesswork from designing pages that convert. Leadpages offers a host of free templates that you can use to build your page or site instead of starting from scratch.
- Integrate your offline marketing efforts using the tool – You can collect prospective customers by asking them to send a code to a mobile number. They will then receive a reply asking for their email addresses. Once they enter, they automatically include themselves in your list. Print out the number and code on your marketing materials like brochures and flyers and give them away during conferences and trade shows.
- Useful and actionable analytics data – You can review the pages and sites you created and see which ones performed the best. Using the information you have, make the necessary changes to your tools to ensure their success. Finally, you can launch an A/B testing campaign to constantly improve the conversion rate of your digital content.
These are just some of the things Leadpages can do for your business. I’ll be discussing each feature as I show how you can use Leadpages to your advantage.
Leadpages features
In this part, I will show how to use Leadpages to great effect by leveraging its features to grow your business.
It’s a step-by-step process starting from creating your account up until analyzing the results of your campaigns.
Setting up your account
First, you need to register by choosing from its three available plans: Standard, Pro, and Agency. You can opt to take the free trial first so you can try out its features before fully committing to it.
To complete your registration, you need to enter your credit card information or your PayPal account.
Next, as part of its onboarding process, Leadpages will ask you what you want to create first.
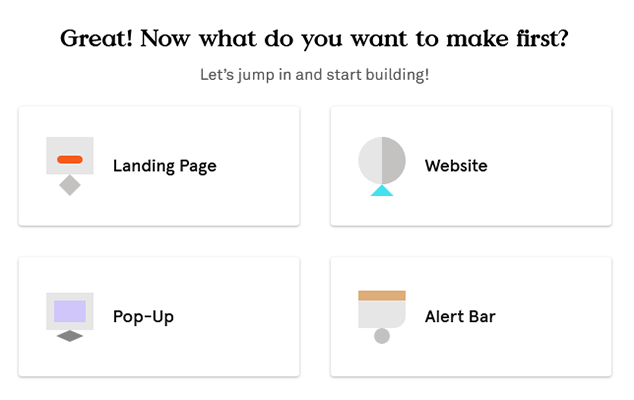
If you choose “Landing Page,” it will ask you to choose a template for the page.
From here, you can choose from different drag and drop templates to use on the page.
You can filter the template to show a particular type to help you narrow down the selection.
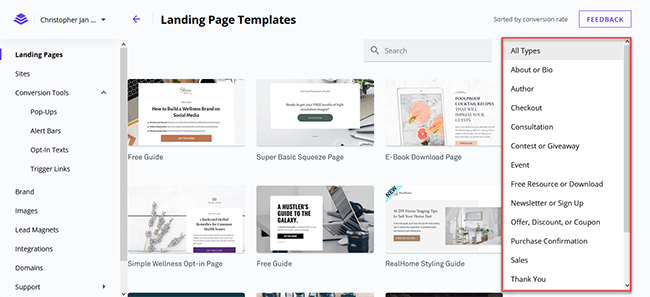
If you’ve gotten the hang of Leadpages for building landing pages, there’s a blank page template you can select. But if you’re new to Leadpages, it’s best to select any of the templates available.
Next, type in the name of the landing page you will create.

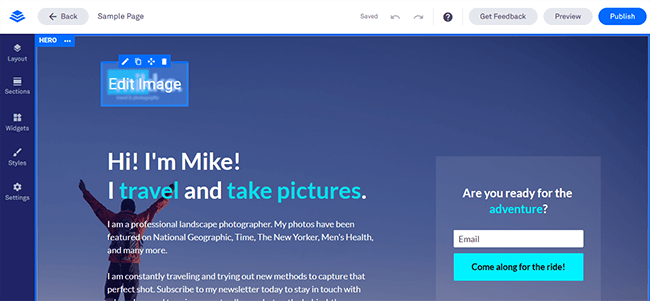
Once you’re in the landing page builder, the fun begins.
Creating and editing your landing page
If you want to edit an element on the page, hover and click on it to show the available options.
Also, for this example, I chose a template for collecting leads and signups. By default, the tool will email you regarding people who fill out your form.
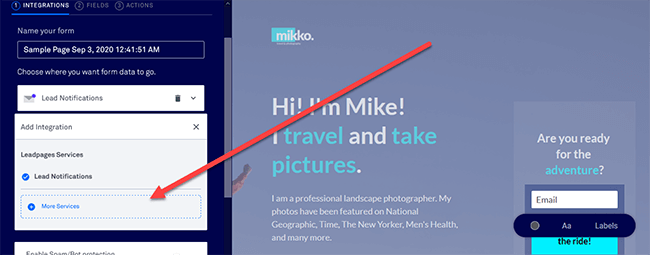
However, it’s best to integrate the Leadpages form with your email platform of choice. This way, all leads go straight to your email list.
To do this, click on the Add an integration > More Services field to connect the landing page builder with various email service providers.
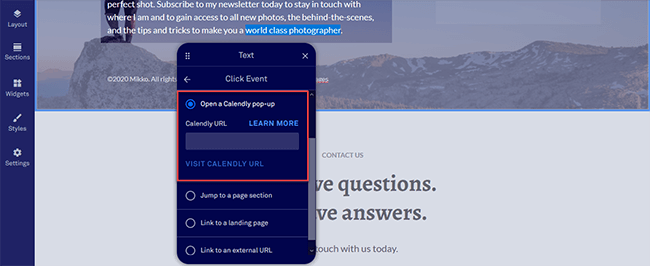
Now, let’s say the call to action of your page is to book meetings and calls with potential clients. What you can do is set up the link to your Calendly page so people can make their reservations there.
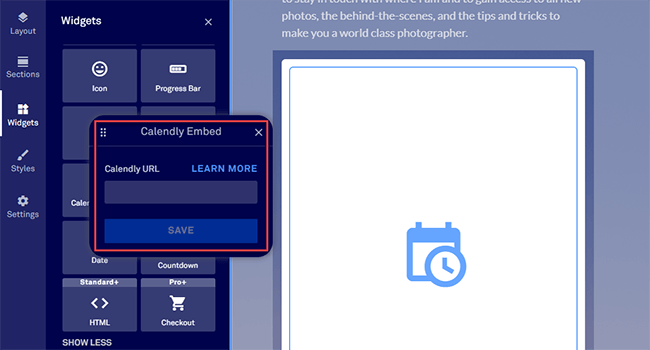
You can even embed your Calendly calendar on the page. Just drag and drop the widget on the page and edit it by clicking on the widget to include your Calendly URL.
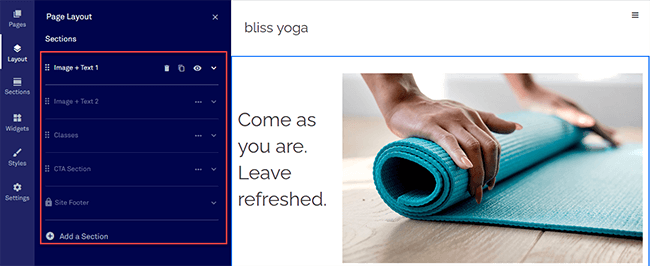
Now, if you want to add more sections on the page, click on Layout > Add New Section on the left sidebar.
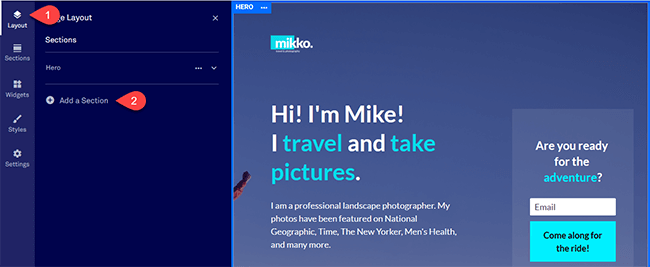
Doing so will automatically create a new section just below the sections that are part of the template.
You can make changes to the section even before adding elements to it. You can change its background image, padding, margin, and column count, among others.
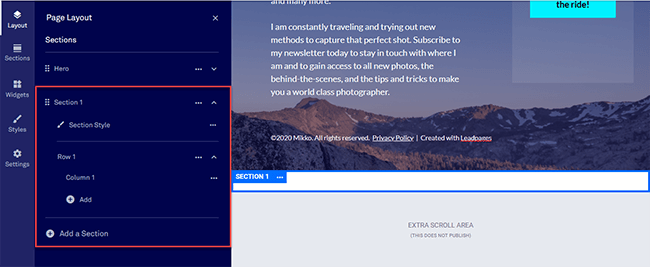
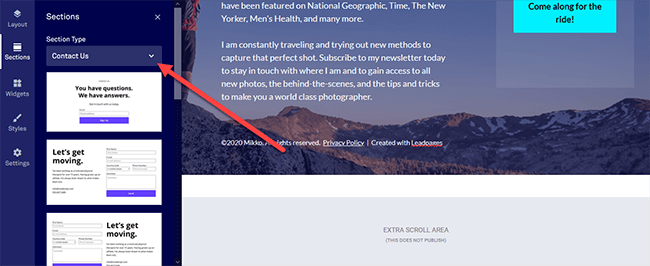
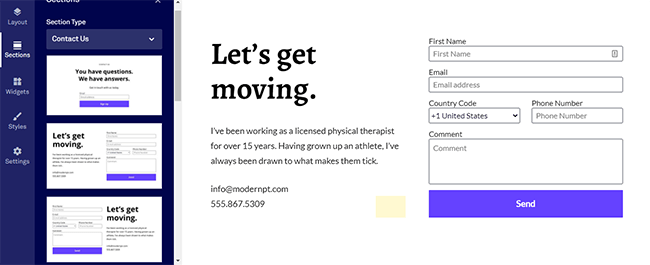
From the newly created section, you can drag and drop the section type that you want to include on the page.
Select Sections and click on the drop-down menu to choose from the pre-made templates.
For Pro and Agency plans, you have the option to sell your products and services straight from your website or landing page. Just drag the Checkout widget and drop it on any section of the page.
To edit it, you must connect your Stripe account first.
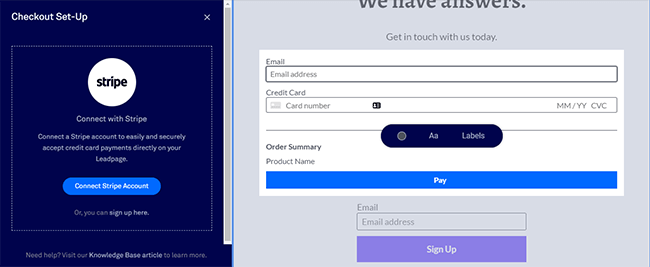
From here, you can set up recurring payments for your on-goings services or one-time payments for digital products you’re selling.
Using this widget, you can create sales funnels so you can earn passively and painlessly!
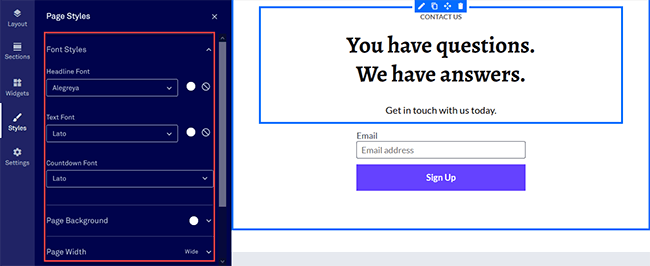
Once you have added and edited the widgets and sections of the page, make sure that the fonts and colors used on the page are consistent with one another.
To do this, click on Styles to make the necessary changes that will apply to all the relevant elements of the page.
Next, if you want to optimize the page for Google search and social sharing, click on Page Settings and make the changes here.
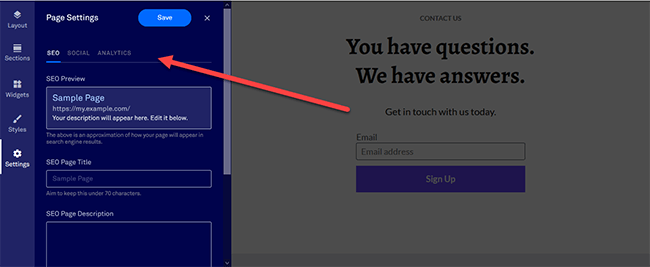
You can also add the tracking code from Google Analytics if you’re publishing it straight from Leadpages.
Once you’re done building the page, it’s best to preview how it looks across different devices.
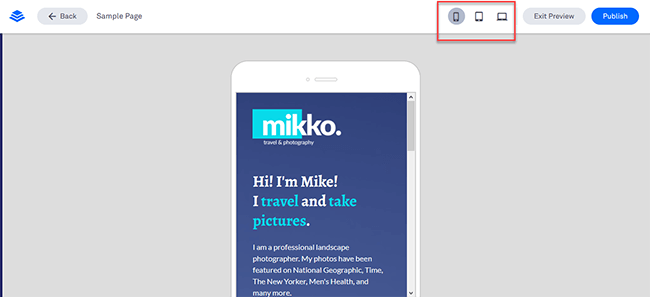
You can then make the changes in the design and layout if you’re not happy with how it looks on mobile or table view.
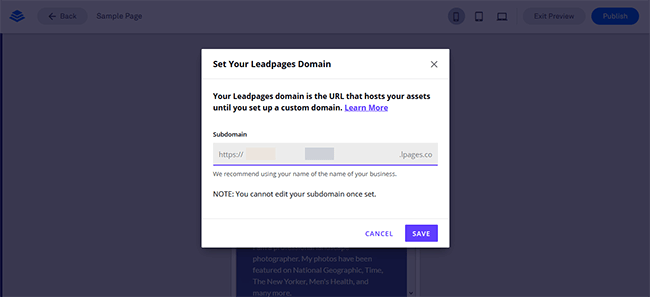
Upon doing that, click the Publish button to set things into motion.
You will then have to assign a URL for the page if you’re going to publish it on Leadpages.
If you already have a custom domain for your landing page, click here to learn how to connect it with Leadpages.
You also have the choice of publishing the page as part of your WordPress site.
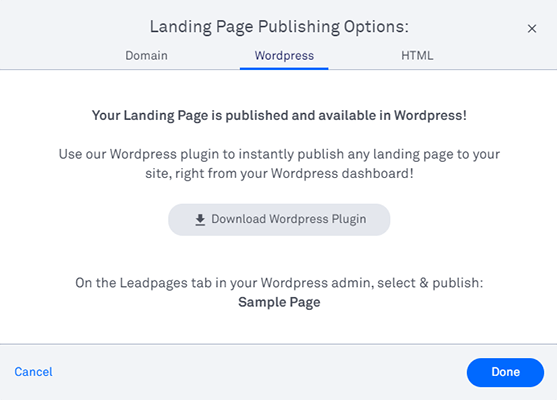
To do this, you must download the WordPress plugin first and connect your Leadpages account from there.
Using this feature, keep in mind that Leadpages still hosts the pages even if they are connected to your WordPress site. For example, if users go to your Leadpages landing pages pointing to WordPress, the page still loads from the Leadpages servers.
This is advantageous because it reduces the server load on your hosting, which leads to more resources allocated to the higher-performing pages of your site.
Analyzing landing page performance
Over time, you can see how the page performed by clicking on the arrow icon of the page you want to analyze.
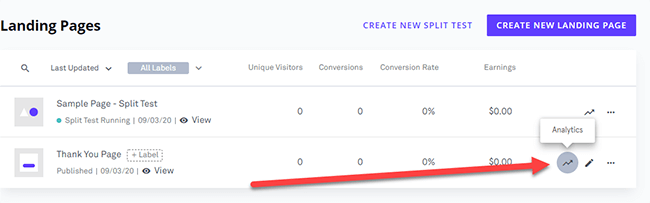
From here, you’ll be able to see how many visitors the page received over time, the conversion rate of the page, and the leads you’ve gathered so far.
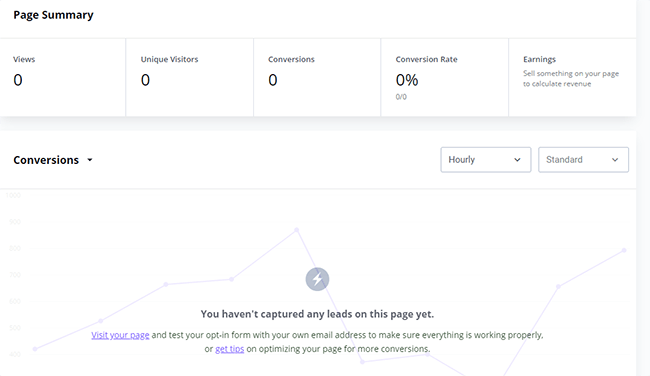
In the screenshot above, the page is new which explains why it doesn’t have views and conversions yet. However, if the page has been around for quite some time and the analytics show low traffic and conversions, you need to find ways on how to improve its performance fast.
For pages with low traffic, try promoting it more on your site or social media. From there, we’ll get a better gauge of how it converts from increased views.
A/B testing
But if the page isn’t converting well despite high traffic, then this is where A/B testing comes in.
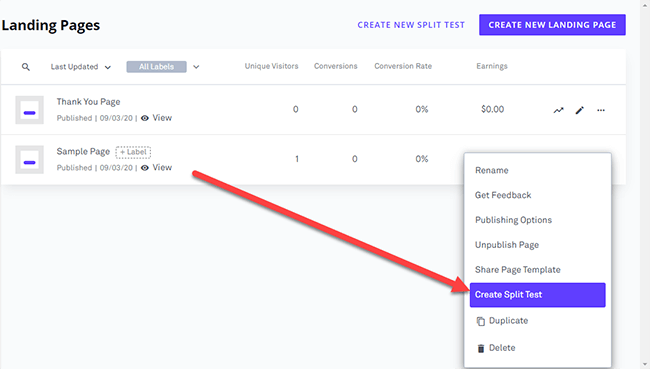
To do this, go to the Landing pages section from your dashboard, determine which page you want to test on, and click on the three-button icon on the right side to open the drop-down menu. From here, click on Create Split Test.
Next, you need to ad the variations of your control page. You can simply copy the control as is and make changes from there, or create a brand new page with a different design.
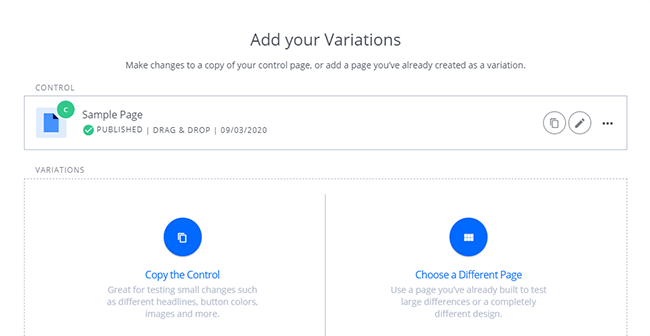
It’s highly recommended to copy the control and just tweak some of the elements. You don’t want a drastically different-looking page from your control page because it will skew the results.
In this example, I’ll be choosing a different contact page layout than the one published in the original page.
By making deliberate small changes, you can pinpoint the page elements that are keeping each from performing well.
You can also as many variations of the control page as you want. For now, however, we’ll stick with just one variation of the control page.
After creating the variation, you will be asked to determine how to distribute the traffic to your visitors.
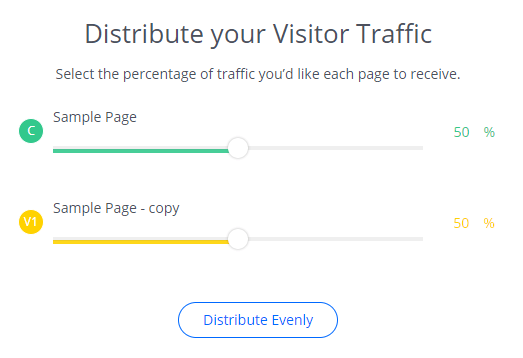
By default, the distribution is an even split on all the pages. This is ideal because giving all pages equal opportunity maintains the integrity of the test. Therefore, the best page wins.
Setting up a lead magnet
If you want to boost the conversion rate of your pages, you can include a lead magnet for each.
When asking people to sign up for your forms, you may need to give them additional incentive to take action. It’s good that you’re building your email list using Leadpages, but it’s better if you can slip in a content upgrade in there to sweeten the deal. This lead magnet will help sway their decision to join your list, especially if the content upgrade is relevant to their needs.
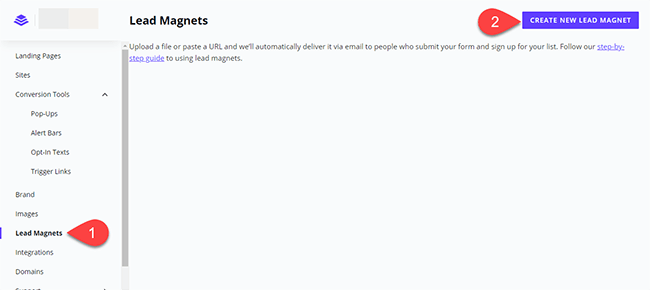
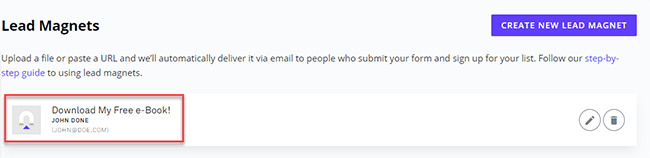
To do this, click on Lead Magnets and click on “Create New Lead Magnet.”
From here, enter the sender and email address where the lead magnet will be coming from.
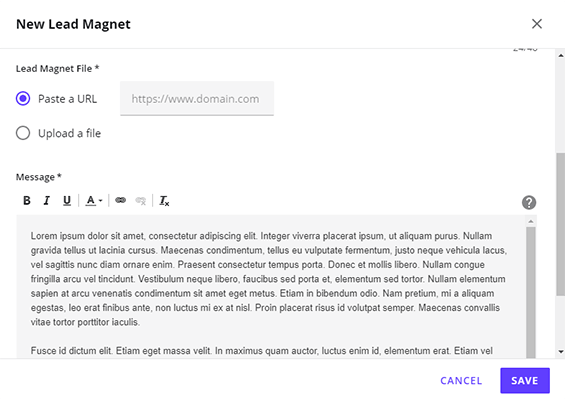
Regarding the lead magnet, you can enter its URL or upload it to Leadpages. Finally, you can edit the email people will receive upon getting a copy of the file.
After saving the lead magnet, you should be able to see it in the Lead Magnets page in the dashboard.
You can then set up the lead magnet for download on the form you’ll be including in your landing page or pop-up.
Just select the form to edit it, click on “Actions,” then choose the lead magnet that people will receive after filling out the form.

This covers the things you must do to set up your landing page. But what about the others?
Using the website builder
Thankfully, the same process applies to all the digital content you can create with Leadpages.
Regarding websites, the available templates you can choose are organized according to their ability to convert.
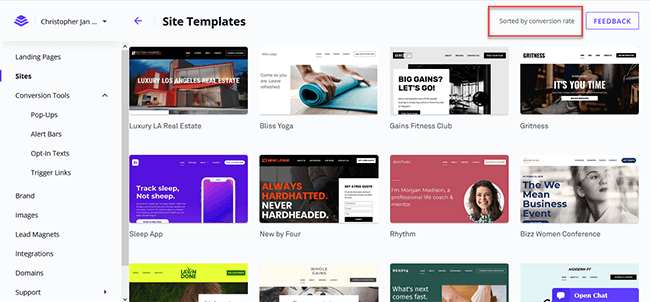
That means the first templates that appear in the selection will help you yield the highest conversion rates.
Compared to landing pages, website templates have lots of premade sections and widgets that you can simply edit.
Once done, you can proceed just the same way as you did with the landing page.
Creating other conversion tools
If you’ve gotten used to building landing pages and websites on Leadpages, then creating alert bars and pop-ups should be a breeze as well.

You can freely drag and drop elements onto the pop-up or bar at will.
However, the difference is that Leadpages doesn’t have standard templates for both.
That means you’re left creating either one from scratch.
To be clear, the lack of templates doesn’t take away the ease of building conversion tools on Leadpages.
For instance, the process of creating alert bars is very simple and straightforward. Just change the layout to your liking, edit the background color and text, and you’re good to go.
Nonetheless, it would be nice to have templates to choose from (at least for the pop-ups). This way, users can focus on relaying their message to their audience instead of worrying about how to design it.
Once you’ve published your pop-up, Leadpages will ask how you want to show it on your site.
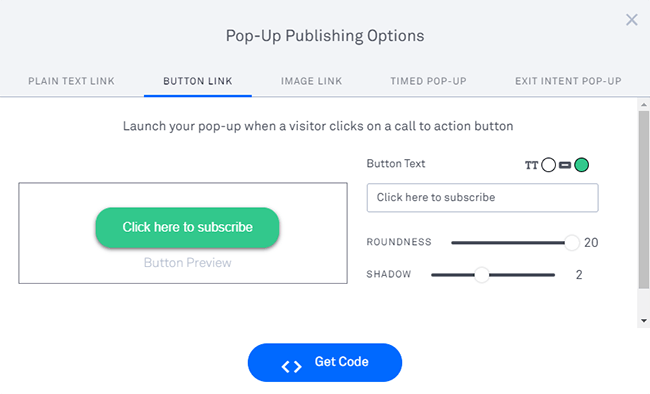
Get the code and paste it on your website or specific pages on it to make it show there.
Another conversion tool that Leadpages lets you create are Trigger Links.
These are buttons that you can send in your emails and allow subscribers to join your sublists within your email platform. This is a great feature to use if you run webinars for your business.
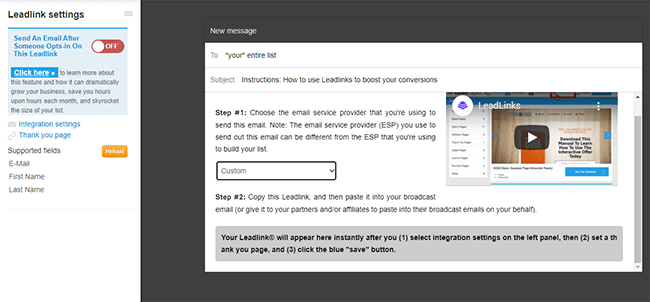
When creating a trigger link, also known as a Leadlink, you must choose an email platform where it will save your lead. You also need to create and set a thank you page that people will see after clicking on the link.
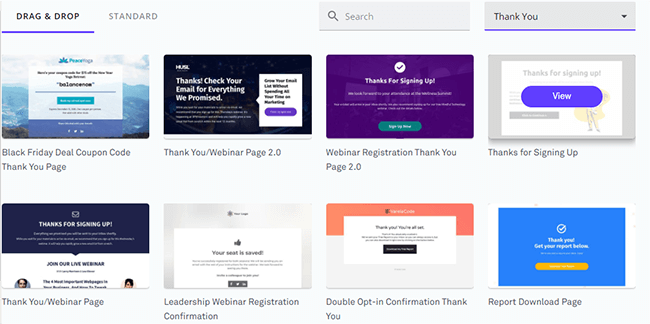
Thankfully, there are thank you landing page templates you can use to make the process much easier for you.
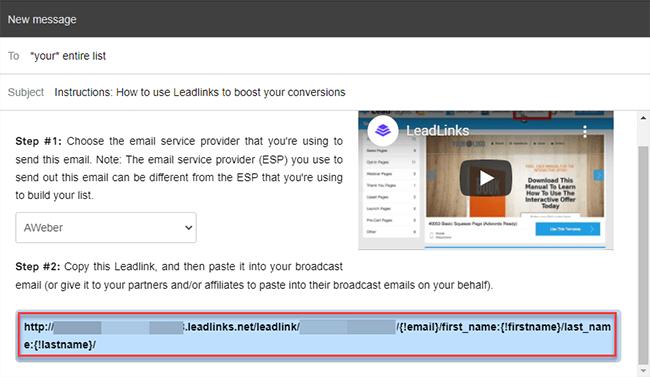
Once you’ve fulfilled the requirements for creating the Leadlink, the page will show you a link that you must include in your emails.
Another conversion tool you might want to use is Opt-in Texts. This allows you to share a mobile number with your target audience that they can message. By entering the correct text message, they can receive your digital files or join your newsletter.
Setting up your opt-in texts is an excellent way to reach out to your non-online audience. By printing the number on brochures, posters, and other print materials, you expand your reach and get more people to join your list.
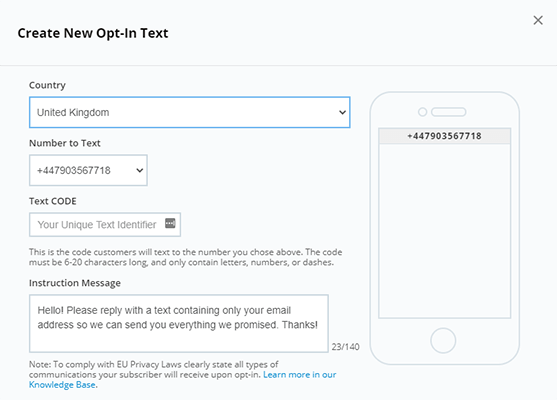
On the downside, there are only four countries allowed to use this feature: Australia, Canada, United Kingdom, and the US.
From here, just enter the CODE that people need to send the number and the instructions they’ll receive after sending the message.
Ultimately, opt-in texts are a simple way to get more subscribers and leads through offline marketing.
Connecting third-party tools
As a popular landing page builder, it only makes sense for Leadpages to have lots of integrations available.
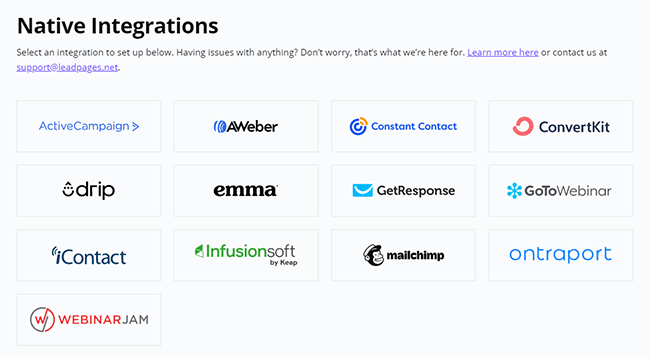
The reason for integrations is simple: You simplify and make the process faster.
No longer do you have to manually export the data from Leadpages and import them to another app. Using integrations, the operation takes place with just a few clicks, if not automatically.
For instance, whenever someone signs up to your landing pages made with Leadpages, an integrated tool like Google Analytics will record this as an event.
This way, you no longer have to manually set the events on GA whenever a site page. The platform will take care of understanding how your landing pages are performing based on this goal.
Below is a shortlist of other third-party tools that connect well with Leadpages:
- CRM – InfusionSoft by Keap, Salesforce
- Digital Advertising – Facebook Ads, Taboola, Google Ads
- Ecommerce – Shopify
- Live Chat – Chat.io, LiveChat
- Social Media – LinkedIn, Twitter
Some of the apps you can integrate with Leadpages require you to use Zapier.
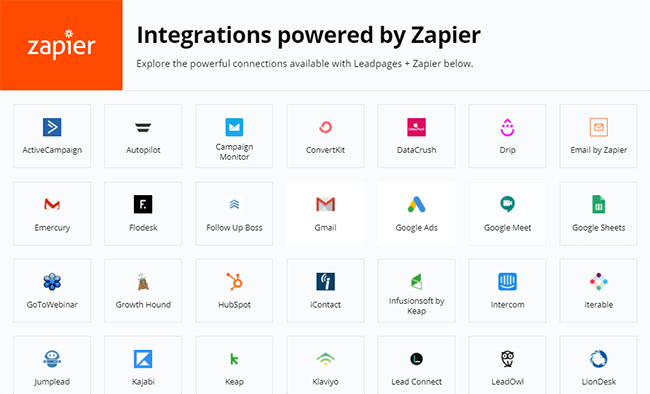
Integrating apps requires you to learn how to use webhooks. As a result, there’s a learning curve when automating your workflows using Zapier compared to using native integrations. However, with hundreds and thousands of tools out there, it’s hard to keep track of the most in-demand tools among users to create a native integration for Leadpages.
Therefore, if you’re using an app that you want the tool to create a standalone integration for, you can place a request here.
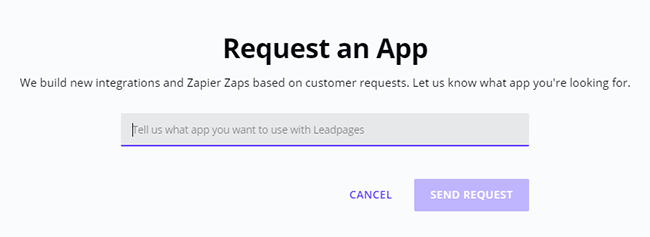
There’s no guarantee that Leadpages will grant your request. But if enough people will vote for an app, they could make a native integration for it.
How much does Leadpages cost?
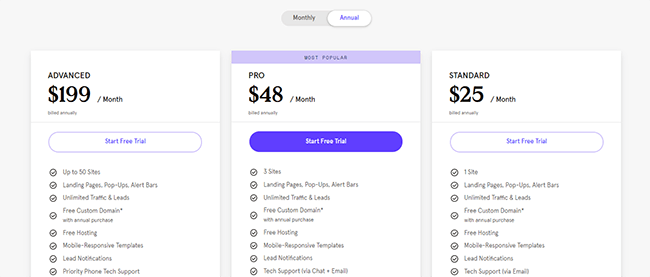
There are three Leadpages plans to choose from:
Standard
Standard costs $37/month (or $25/month paid annually) and offers the most basic features of Leadpages, including:
- The publishing of one (1) site using the tool’s easy to drag page builders
- The creation of unlimited landing pages, alert boxes, and pop-ups
- The ability to choose from professionally-made and high-converting templates that you can easily customize and edit
Pro
The most popular plan, Pro, is at $79/month (or $48/month paid annually). Not only does it allow you to create more websites (3 sites compared to 1 from Standard), you can also enjoy exclusive features such as:
- Accepting recurring payments and send over digital products from your landing pages
- Running A/B split tests to help you understand the conversion rate of your landing pages and how you can improve it
- Send emails to your subscribers inviting them to join your email lists or attend your webinar
Advanced
The last plan, Advanced, costs $321/month (or $199/month billed annually). It has all the features available in the Pro plan. However, not only can you create a whopping 50 sites on Leadpages, but you can also:
- Send leads straight to marketing automation tools like Hubspot, Marketo, and others
- Create a maximum of five (5) subaccounts to your team members to help you organize your landing pages and leads
- Receive 50 additional Leaddigits Ⓡ code (eligible for sharing with subaccounts) so you can collect more leads via text messaging
If you’re unsure if Leadpages is for you, sign up for a 14-day free trial and take it for a test drive. The trial is available for all plans, so you can use Leadpages and all its features to help you make an informed decision.
To maximize your subscription, I highly recommend you sign up for their annual plans. Not only will you end up paying 39% less compared to a year-long account paid monthly, but you will also get a free domain from Hover that you can connect with the site you’ll create with Leadpages.
All in all, Leadpages pricing is very competitive compared to other landing page builders considering the features available across plans.
Leadpages pros and cons
I showed you in this Leadpages review how to use it for the benefit of your business.
But before pulling the trigger on this tool, you must know its strengths and weaknesses first before you can make an informed decision.
In that case, below are factors you might find useful about Leadpages when I used it:
Pro: Easy to use drag and drop builder
What makes Leadpages a superior landing page creator is the intuitiveness of its drag and drop builder.
Even if you’re new to creating landing pages, you won’t have problems designing beautiful pages, sites, and pop-ups for your startup.
Just choose the best template for your site or page, add new sections and widgets as you see fit, and edit them before publishing it. You can also move around the widgets to a specific area on the landing page to make it your own.
Con: Clunky A/B testing
The A/B testing of Leadpages, while capable of giving the necessary data from your created conversion tools, feels rough around the edges.
At best, it’s a helpful tool that allows you to determine which variation won over a period of time. You can then end the test and use the winning variation moving forward.
However, there’s no way to export the data to CSV if you want to get into the nitty-gritty of your conversion tools.
To be clear, Leadpages’ A/B testing feature is not bad by any stretch. But due to the strengths of its overall features, this is by far one of its weakest areas.
Pro: Bang for the buck
The price of a tool shouldn’t be as important as the amount of money you can make using it. However, given the host of features you can use with it, Leadpages pricing feels like you’re getting a bargain especially when subscribing to its annual plans.
On top of getting a 39% discount compared to paying monthly, you also get a free domain that you can use for the tool’s website builder.
This is important for startups and founders who want a simple solution for launching their online business.
They won’t have to worry about the nuts and bolts of building a website because Leadpages takes care of that for them. And it does this without running short of money, thanks to the LeadPage pricing.
Cons: Website builder not ideal for bloggers
While Leadpages does well for startups and business owners, the same can’t be said for bloggers.
Some bloggers might want to leverage the platform’s ability to create conversion tools to help them grow their email lists or generate money from their courses.
However, there’s no way for them to publish blog posts from the website builder.
Therefore, they will still have to set up a separate blog on top of using Leadpages. In a way, this defeats the purpose of signing up for Leadpages in the first place.
That said, it’s possible we’ll see this as an additional feature in the future.
Pro: Customizable templates
Another awesome feature of Leadpages is its ready-to-use templates for your landing pages.
The last thing you need to worry about your blog or online business is the layout of your website or landing page. While its appearance is important in communicating your services to your target audience, setting them up can be a painstaking process especially if you’re not a designer.
In that case, Leadpages makes this process easier thanks to the free templates that come with your subscription.
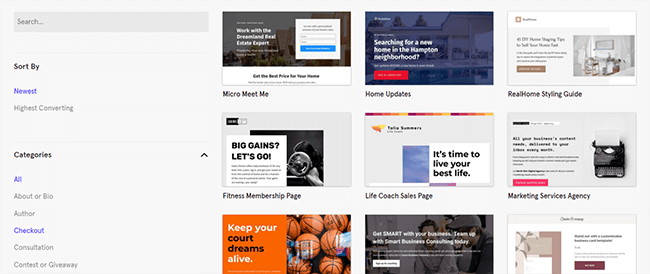
Choose from hundreds of templates for your site. To help you find the right template, filter the templates to only show templates from a specific category or industry. You can even organize the results to the newest or highest converting.
Once you’ve chosen the template, all you must do is edit it by changing the images, colors, and text. This should only take you minutes to complete as opposed to designing everything from scratch.
Pro: AI headline generator
Leadpages have jumped on the AI bandwagon and included a nifty headline generator called AI Engine. This is quite the time-saver.
Whether you have no idea where to start with your headline, or you need some creative suggestions for new angles – this feature will help.
Pro: All-in-one business suite
Through the years, the demands in digital marketing have increased.
As effective as landing pages are, they won’t be enough to help improve your conversion rates. You need to create a marketing strategy using other tactics that complement your landing pages.
Leadpages is aware of this, which is why it expanded its features to offer a variety of conversion tools.
These new features from Leadpages let you leverage your website aside from just relying on your landing pages to turn visitors into leads or customers. As a result, you can grow your startup faster.
Verdict
If there’s one thing you should have learned from this Leadpages review is that the tool is unlike any of the landing page builders on the market.
For starters, what makes it one of the best online business tools out there is its ease of use.
Creating conversion tools is all-too-easy thanks to the Leadpages drag and drop builder. Even without design experience, you can build beautiful pages using its pre-made templates. You can then make changes to the existing widgets using the tool’s WYSIWYG editor.
Also, and as mentioned many times already, it has become more than just for creating high-converting pages.
For startup owners who want to build an online business from the ground up, Leadpages gives them a chance to create a website and build multiple pages for their services. They can then set up appointment and recurring payment widgets to help convert potential customers.
From this vantage point, your business knows no bounds if you use this software!
Finally, Leadpages’ pricing is affordable enough considering the features you get from all the pages. Aside from the unlimited creation of conversion tools such as pages and pop-ups, you can create marketing funnels, send SMS messages, and a host of other benefits.
Therefore, if you’re truly serious about your business, whether you’re a solopreneur or a budding agency owner, consider giving Leadpages a try. Its generous 14-day free trial gives you all the time you need to test out its features and see if it’s something that can help put your business in the right direction. Chances are, you’ll end up with Leadpages for the long haul.
Disclosure: If you buy through links on our site, we may make a commission. This helps to support the running of Startup Bonsai.