Sendible Review 2024: Features, Pricing, Pros And Cons
Welcome to our Sendible review.
Sendible is one of our top-recommended social media tools, but just how good is it?
That’s the question we’ll be exploring in this post.
We’ll start by explaining what Sendible is and reviewing all of its key features, then we’ll look at pricing and reveal what we think the platform’s biggest pros and cons are.
And finally, we’ll give you our final verdict on how good Sendible is, and who it’s best suited for.
What is Sendible?
Sendible is an all-in-one social media management tool with over 30,000 users.
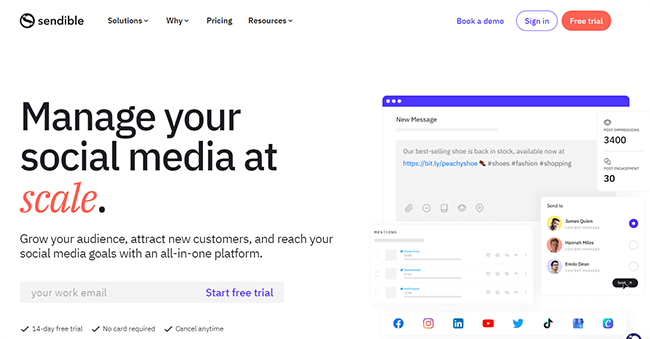
It streamlines your workflow and gives you all the tools you need to manage multiple clients, social profiles, and campaigns in one place.
For example, Sendible’s publishing tools enable you to create and schedule a month’s worth of content in as little as a few hours.
Meanwhile, you can use the built-in social media inbox to manage and reply to all your incoming messages.
Plus, view your social feeds, monitor mentions, and track engagement metrics across platforms all from the same app.
There are lots of social media management platforms out there that share the same features, but Sendible is a particularly popular choice for marketing agencies and teams.
One reason for this is that it’s one of the only fully brandable SMM platforms, with a white-label plan that lets you add your own brand colors and connect Sendible to your own domain.
Aside from that, Sendible also offers some of the most advanced reporting tools on the market, as well as custom user roles, approval workflows, and all the other stuff you need to collaborate with your team and clients effectively.
What features does Sendible offer?
Sendible comes with lots of different tools and features to help with all areas of your social media marketing efforts.
These are grouped into several ‘apps’ to keep things organized:
- Profiles (Facebook, Instagram, Twitter, LinkedIn, GMB, YouTube, TikTok, & WordPress integrations)
- Publishing (Content calendar, post scheduling, content queues, Canva & Pexels integration, etc.)
- Activity (Unified social inbox, social feeds, etc.)
- Content (RSS feeds, content library, Google News alerts, etc.)
- Reports (Automated email reports, report builder, engagement metrics, individual platform insights, Google Analytics, etc.)
- Team features (Tasks; team members, clients, and administrators; permissions, custom approval workflows, white labeling, etc.)
- Mobile apps
We’ll take a closer look at all of the above next as we explore the Sendible platform.
Getting started
Sendible makes it super easy to get started.
The first time you log in, you’ll be given the option to take a guided tour, with handy tooltips that show you how everything works.
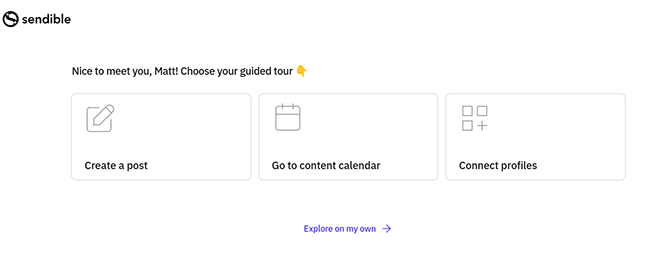
This can help you to get to grips with the platform if you’re a complete beginner.
If you’d prefer to explore on your own, you can skip the tour and jump straight into your dashboard:
You can access all of Sendible’s tools and features from the navigation bar at the top of the page.
The first thing you’re going to want to do before anything else is connect your social media accounts to Sendible, so let’s start there.
Profiles
Sendible integrates with seven different social media platforms:
- Google Business
- YouTube
- TikTok
To connect your profiles, go to the Profiles app.
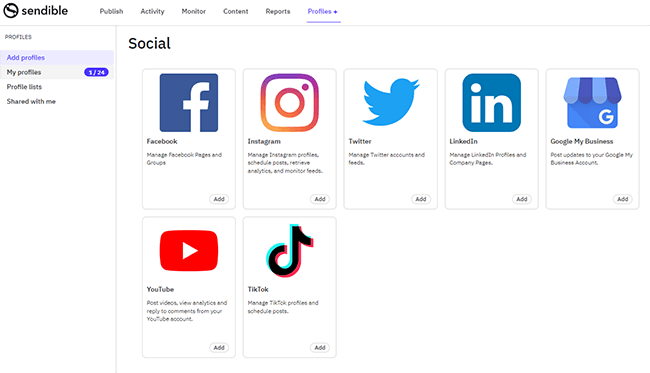
Then click Add underneath whichever platform you want to connect first and follow the instructions on-screen. It should only take a few seconds.
The number of profiles you can connect will depend on your plan (see the pricing section of this review for more information), and you’ll be able to see any profiles you’ve already connected under My profiles.

Under Profile Lists, you can organize your social profiles into groups.
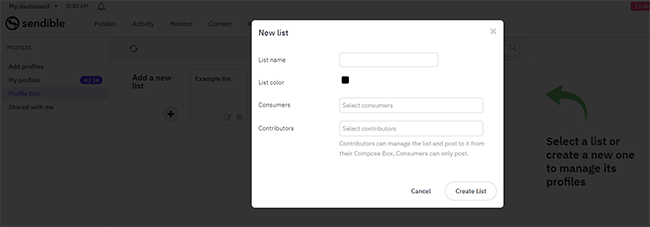
This comes in useful as once you’ve created a list, you’ll be able to compose and schedule posts for all the profiles in that list at once.
Speaking of which…
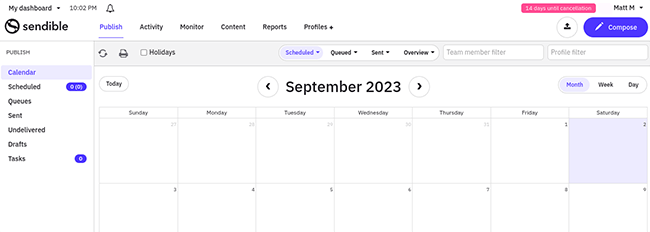
Publishing
To start creating and scheduling posts, open the Publish app.
Here, you’ll see your content Calendar, which gives you an overview of all the posts you’ve scheduled so far. You can change the view to by day, week, or month.
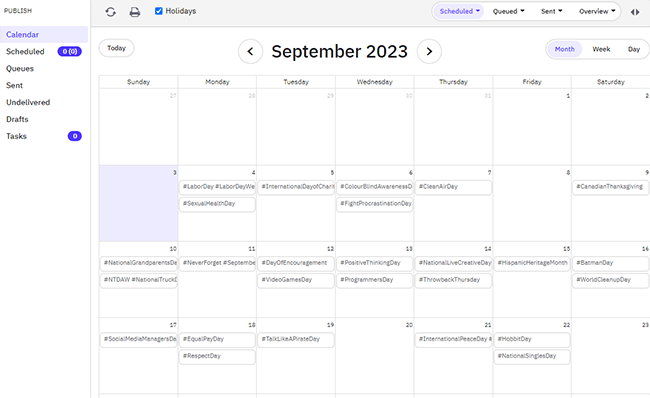
If you click the Holidays button, each cell in your calendar will be populated with the most popular hashtags for whatever national and international holidays take place on that day.
This comes in useful when planning content as it can give you inspiration and ideas for things to post about.
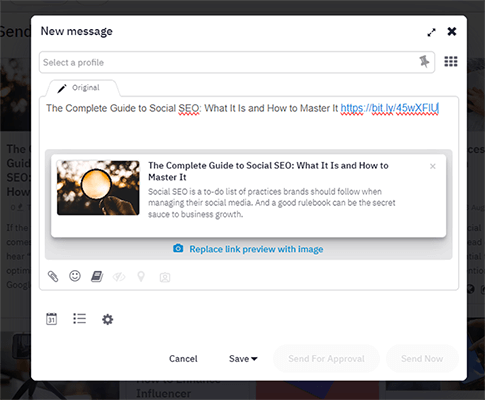
To compose a new post, click the date in the Calendar that you want to schedule it on. Alternatively, if you want to publish it straight away, just click Compose in the top right.
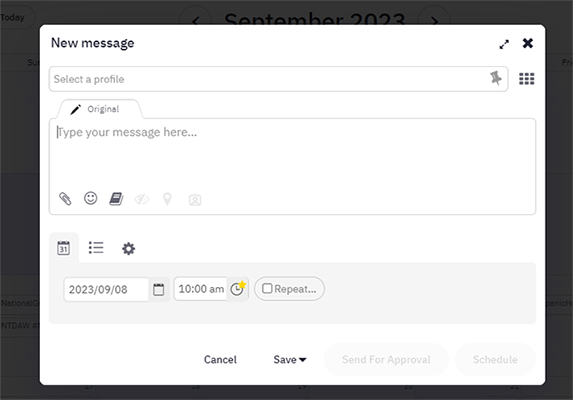
Then, in the compose window, select the profiles you want to post to and write your message in the text box below. You can customize the message/caption for each selected social media profile.
Unfortunately, one thing I noticed here is that Sendible doesn’t have its own AI post writer (yet)—you still have to write all your post captions/messages yourself. This is a little disappointing as most competitor tools have some sort of AI writing capabilities already.
Once you’ve written your caption, you can add emojis and trending hashtags from the toolbar at the bottom.
Design tools
If you want to add visuals to your post like graphics, images, and videos, click the paperclip icon underneath the post caption.
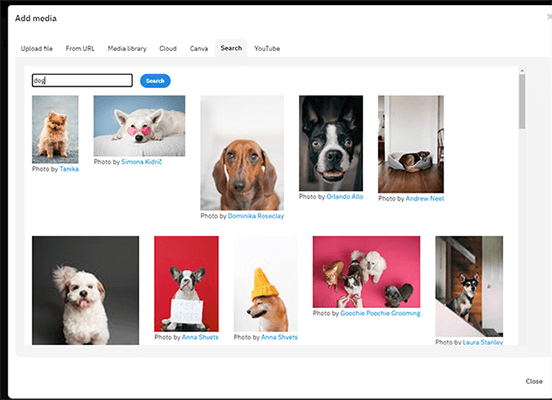
Next, you have a few options. Option one is to just upload visuals from your PC or from a URL.
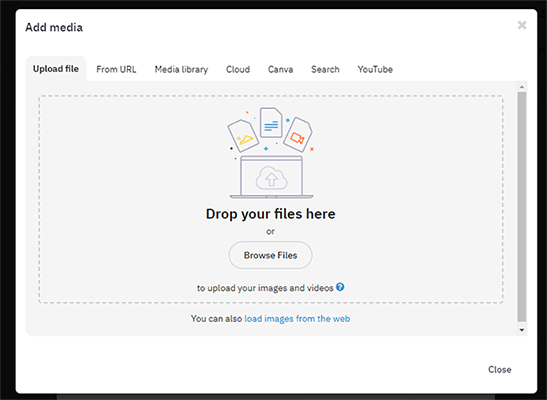
Alternatively, you can search for CC-licensed images on Giphy, Pexels, and Flickr without leaving Sendible thanks to the native integrations. Or embed videos directly from YouTube.
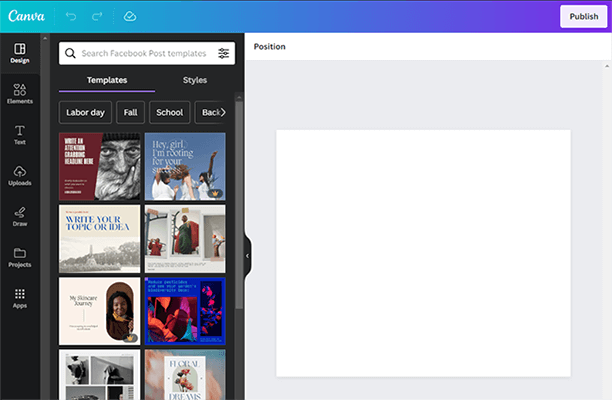
The other option is to design your own images from scratch using the built-in Canva app. Just select a template from the list of options, and Sendible will load up Canva inside the platform, where you can create your graphics.
Once you’ve got everything ready, you can schedule the post to your calendar, publish it immediately, or send it for approval (more on this later).
Queues
Aside from the Calendar, you’ll also find the Queues tool in the Publishing app.
The idea behind queues is that, instead of composing and scheduling posts individually, you can just add the new posts you create to a queue, and they’ll be automatically scheduled to go out at pre-specified times/days of the week.
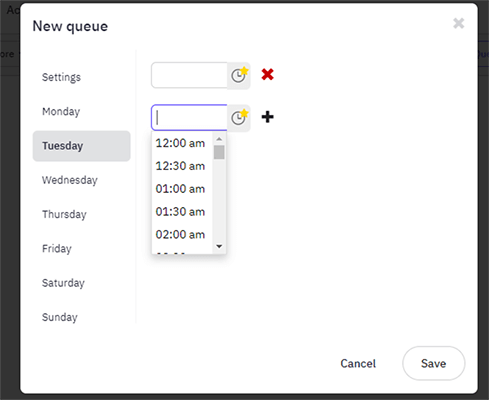
It works like this. First, go to Publish > Queues > New Queue.
Then, create your timeslots (these are the times/days that posts in your queue will be published). You can choose the time on each day yourself or let Sendible pick the optimal time for engagement based on data.
Finally, give your queue a name, and turn Recycle messages on or off.
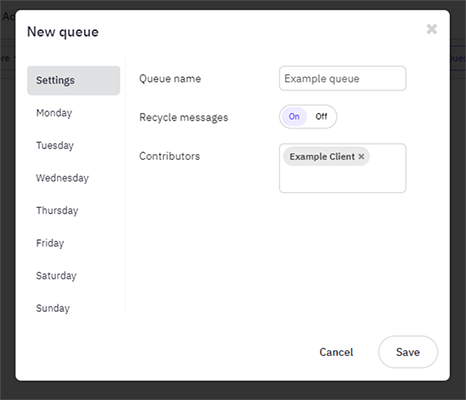
If you turn it on, whenever Sendible publishes a post in your queue, it’ll automatically re-add it to the back of the queue to be sent out again at a later date. This can help you squeeze more value out of your evergreen content.
Once you’ve created your queue, you can stop composing posts and adding them to it.
Every time an open timeslot in the queue is reached, Sendible will publish the post at the top. At the next timeslot, it’ll publish the next post in the queue, and continue cycling through in this way until the queue is depleted. All you have to do is keep your queue topped up with fresh content, and Sendible will do the rest.
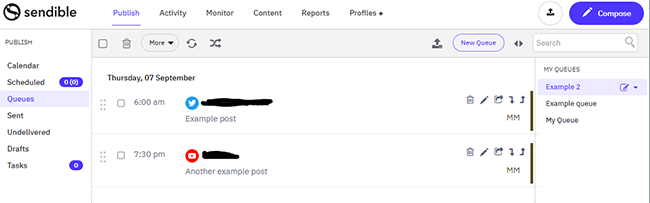
If there’s a post you need to go out urgently, you can move it to the bottom of the queue manually. And if you’re recycling content and want to stop your posting schedule from getting too repetitive, you can click the shuffle button to randomly change the order.
Bulk scheduling
One last Publishing feature we want to mention before we move on is the bulk scheduling tool.
You can access it by clicking the Compose messages in bulk button in the top right corner of the page, next to Compose.
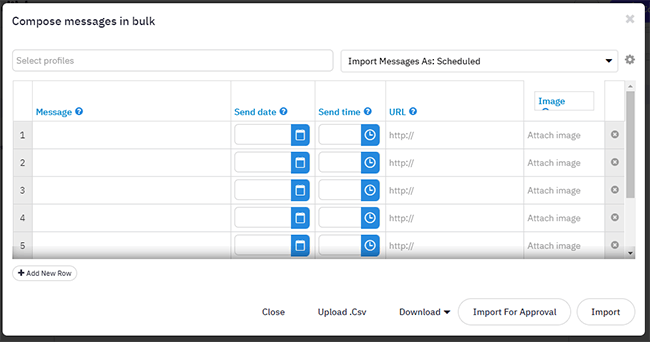
With the bulk composer, you can create and schedule multiple posts very quickly by filling out the rows and columns in the table.
If you already have a bunch of posts ready to go and you want to import them to Sendible, you can do so by uploading a CSV file. It’ll need to be formatted correctly to work.
Activity
The Activity section is where you engage with your audience and view incoming messages and comments in Sendible.
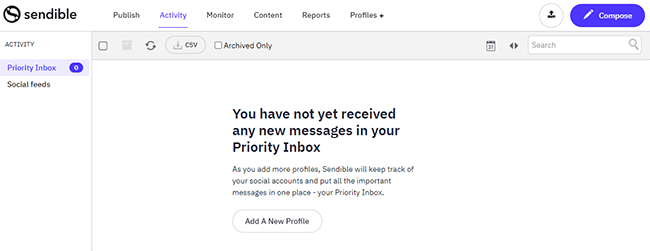
It’s split into two tools: Priority Inbox and Social feeds.
In the Priority Inbox, you’ll see an alert view of the most important recent social engagements (e.g. comments, DMs, replies, retweets, etc.) pulled from all your connected social profiles. These are displayed in chronological order.
You can respond to messages and comments directly from the Priority Inbox, and even repost them on your own profiles.
What’s cool is that Sendible offers sentiment analysis too, so all these engagements are categorized by sentiment. The colored dot at the beginning of each item tells you whether it’s positive (green), negative (red), or neutral (grey).
However, because it takes a while for Sendible to analyze the sentiment of your engagements, your Priority Inbox doesn’t update in real time. It takes a couple of hours for messages to appear here from when they’re posted.
For real-time updates, you’ll want to look at the Social Feeds tab instead.
Content
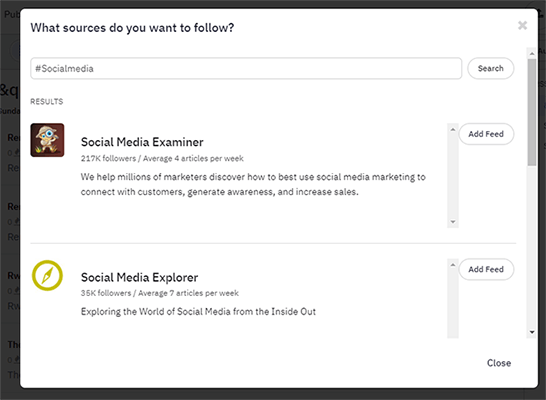
To make it easier for you to fill out your Calendar, Sendible comes with a couple of useful content curation tools. You can access them from the Content tab.
From here, you can set up RSS feeds that pull in the latest blog posts from your chosen publications. That might be your own website or a popular news source in your industry.
Just click New Feed > Publications & Blogs. Then, search for an RSS feed by title, URL, or topic, and click Add feed once you’ve found it.
The RSS feeds page will then be populated by all the latest content from that feed. You can view it all in a list layout or grid layout.
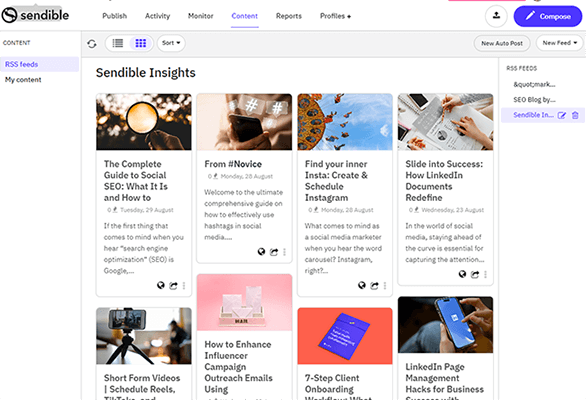
If there’s a post in the RSS feed that you want to share on social, click the share icon and Sendible will automatically pull the title, shortlink, and preview images into the composer ready for publishing/scheduling.
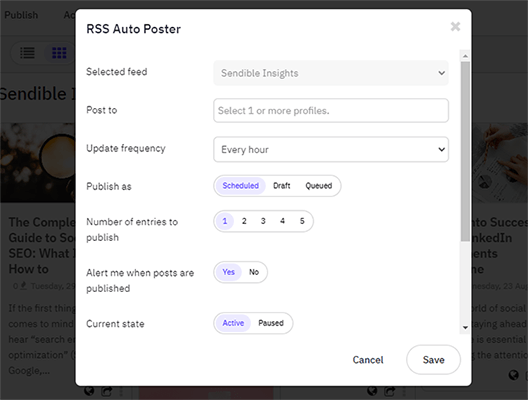
If you want to automatically share every new post from your RSS feeds to your socials, you can use the RSS Auto Poster. You can choose how often you want to share new RSS posts and the number of entries to include per post.
Aside from RSS feeds, you can also create Google Alerts feeds or import your own feeds manually as OPML files.
Below the RSS feeds tab in the Content app, you can click My content to access the Sendible content library. This is only available on some of the top-tier plans. It lets you store articles and social media posts that you’re not ready to post just yet for later use.
Reports
Sendible’s reporting functionality is second to none. It’s one of the platform’s biggest strengths.
To get started, click the Reports tab. This will bring you to the Reports hub.
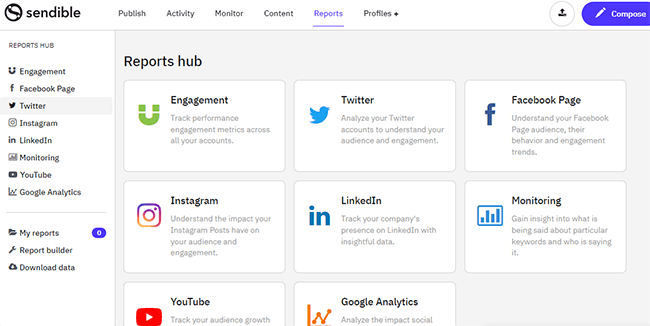
From here, you can choose between a bunch of different premade report templates.
The Engagement report gives you an overview of the most important engagement performance metrics across all your profiles. The Monitoring report gives you insights into what’s being said about your tracked keywords, including brand sentiment, audience insights, etc. And you can also generate reports for each social media platform individually.
Choose any of the options, select your date range, and click Generate Report to load it up.
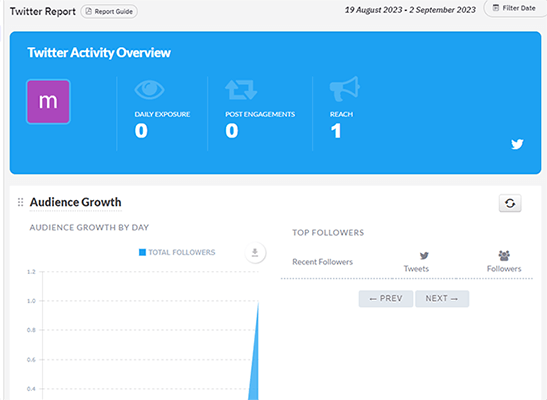
On each report, you’ll see plenty of graphics and charts to help you visualize the data, which are super easy to digest. You can print the report, save it, or send it out by email using the buttons at the top right of the page.
If none of the pre-made reports have all the data you need, you can build your own report with custom data modules from scratch using the Report builder.
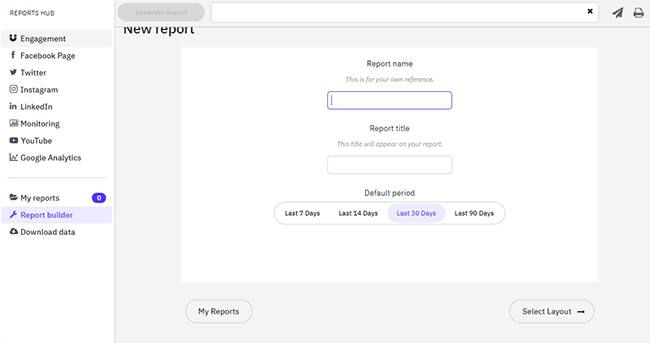
First, enter a name and title for the report, and choose a time period. Then, select a layout. You can organize it into 1 column, 2 columns, or a mixture of the two on different rows.
After that, you can choose from over 250 drag-and-drop modules to customize your report, so that it shows exactly what you need.
In addition to generating reports on-demand, you can also set up automated email reporting (select plans only) to deliver beautiful, branded PDF reports to your clients at set frequencies.
Note: Reporting/analytics for Twitter is no longer available.
Team features
As we mentioned earlier, Sendible has been built with teams and agencies in mind.
As such, it comes with a bunch of features to make it easier for you to work with clients and collaborate with your team.
To add new users to your account, click your profile name in the top right corner, then Manage users.
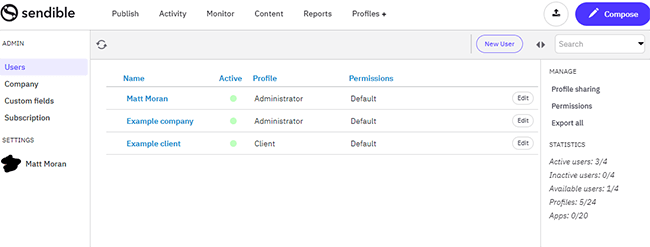
From here, you can create new accounts for all of your team members, clients, and admins, who will then be able to log in to their own Sendible dashboards.
Agencies might want to set up separate client dashboards with different social sets, making it easy to manage all the brands you work with from one place. You can switch between all the dashboards you manage from the dropdown menu in the top left. And on the White Label plan, you can customize dashboards with your own branding and domain.
Sendible also lets you control what each user can do from their account through customizable permissions, access limits, and user hierarchies.
On certain plans, you can also set up Custom Approval Workflows. With approval workflows, you can require any new posts your team creates to require approval before publishing. This makes it easier to designate team leaders and ensure consistent quality across the board.
You can also assign Tasks to team members, and view any tasks assigned to you under Publish > Tasks. Plus, collaborate and exchange comments with assignees, add notes to tasks, and more.
How much does Sendible cost?
Sendible offers three pricing plans: Creator, Traction, and White Label.
The Creator plan starts from $29/month, or $25/month when billed year). It includes unlimited scheduling, as well as all the core features like planning, publishing, content ideas, monitoring, replying, and reporting. You can have up to 1 user and 6 social profiles on the Creator plan.
The Traction plan starts from $89/month, or $76/month when billed yearly. It comes with everything in Creator plus team collaboration features, assignment and approval workflows, and user management tools. You can have up to 4 users and 24 social profiles on the Traction plan.
The White Label plan starts from $240/month, or $204/month (that’s with the current promotional offers that are active at the time of writing). It comes with everything in Traction plus custom branding and domains, content and hashtag libraries, account management, and more. You can have up to 20 users and 60 social profiles on the White Label plan.
If none of the above plans fit your needs, you can contact Sendible to discuss a custom plan and arrange a demo. Custom plans can include unlimited users, white labeling, SSO, and other features you don’t get with other plans.
All plans include a 14-day free trial.
Sendible pros and cons
After trying Sendible out extensively, here’s what we think its main pros and cons are.
Sendible pros
- All-in-one feature set. Sendible isn’t just a social media scheduler like many of its competitors. It’s a true AIO social media management platform complete with social listening tools, reporting, and a unified social inbox.
- Easy to use. Sendible is incredibly easy to use with a clean, simple interface that we really liked. The post composer is super straightforward, and the calendar is easy to work with. Everything is beginner friendly so there’s no learning curve whatsoever.
- Unlimited scheduling. No matter which plan you sign up for, you can schedule as many social media posts as you want. This makes it great value for money compared to some alternative platforms, which charge more for higher scheduling limits.
- Great for teams. Probably the best thing about Sendible is how well-suited it is to teams and agencies. White-labeled dashboards, custom user roles & permissions, tasks & approvals… It’s got everything you need to seamlessly collaborate with your clients and team members.
- Excellent reporting capabilities. Sendible reports look great and include all the metrics and KPIs you need. You can build your own custom reports with your choice of hundreds of data modules, or use one of the pre-made templates.
- Mobile app. Another thing we like about Sendible is that it offers its own apps for iOS and Android, so you can publish and approve posts, view and reply to engagements, and more on the go.
- Value for money. Some competing tools charge a huge amount of money for additional profiles + user accounts. For example, on Sprout Social’s lowest plan, you get 5 profiles + 1 user for $249/month. Whereas for $89/month with Sendible you can get 4 users and 24 social profiles. To get the equivalent number of users with Sprout Social, you’d be paying over $800/month. So, Sendible is almost 10 times cheaper.
Sendible cons
- No AI writer. Sendible is late to the party when it comes to generative AI. Most of its competitors have already integrated AI writing tools to help users generate post captions quickly, but at the time of writing, Sendible hasn’t. Hopefully, this is something they’ll add in the near future.
- Important features aren’t available on low-tier plans. Each of Sendible’s pricing plans gives you access to different features. And unfortunately, some of the most important ones are only available on higher-tier plans. For example, the Content Library seems like it should be a core feature that’s included in all plans, but it isn’t. That said, higher-tier plans do work out more affordable than most competitors.
- Twitter/X integration only supports publishing. You won’t be able to reply to messages in the social inbox or view analytics/reporting for Twitter/X. Not Sendible’s fault, however. This is due to Twitter/X slapping on huge fees for access to their API. It used to be completely free, just like the API offered by Meta (Facebook and Instagram).
- No Pinterest or Twitch integrations. Sendible supports most social media channels, but not all of them. In particular, I would have liked to see it integrate with Pinterest and Twitch.
Sendible alternatives
Sendible isn’t your only option when it comes to social media management tools. If you don’t think it’s a good fit for your needs, check out these alternatives.
Pallyy
Pallyy is a social media scheduling tool that’s ideal for users focusing on Instagram and TikTok.
It comes with basic cross-platform scheduling capabilities, analytics, and a unified inbox, plus some features you don’t get with Sendible like a neat Instagram feed planner and link-in-bio tool.
It’s super affordable with a generous free plan and paid plans starting at $18/month.
Visit Pallyy | Read our review
SocialBee
SocialBee is another all-in-one SMM platform that gives you everything you need to create posts, schedule them, and manage all your profiles and campaigns from one place.
It supports all the same platforms as Sendible, plus Pinterest. It also comes with an AI-powered caption generator that can save you a bunch of time.
Plans start from $29/month, so it’s in a similar ballpark to Sendible in terms of cost.
Visit SocialBee | Read our review
Final thoughts on Sendible
That concludes our in-depth Sendible review.
Overall, Sendible is a great choice for agencies, teams, and busy social media managers who are looking for an all-in-one platform that can do it all. It can power most of your social media strategy.
It’s easy to use and loaded with powerful features to help with all areas of your social media campaigns, and its reporting and collaboration tools are second to none.
You can try Sendible out for yourself for free with the 14-day free trial (no credit card required).
Good luck!
Disclosure: If you buy through links on our site, we may make a commission. This helps to support the running of Startup Bonsai.